4 Common Chemicals That Increase Breast Cancer Risk

4 Common Chemicals That Increase Breast Cancer Risk

By Amber Lowry

October is Breast Cancer Awareness Month, and we wanted to do our part in sharing ways you can decrease your risk of breast cancer. Below are a handful of cancer-causing agents that many of us come across in our everyday lives.

1. BPA (Bisphenol A)

dolce-diet-1-on-1-consult-800Ever consider splurging on that water bottle that’s slightly more expensive than your typical 99 cent bottled water? Well here is a good reason to do just that. BPA is a chemical that’s used as a plasticizer in many common products including water bottles, food takeout containers and much more. Basically anything that is made with flimsy plastic will contain BPA. A 2015 paper published by Poland’s Department of Clinical Experimental Endocrinology stated that BPA “plays a role in the pathogenesis of several endocrine disorders including male and female infertility, precocious puberty, hormone dependent tumors such as breast and prostate cancer and several metabolic disorders including polycystic ovary syndrome.”
It is important to note that BPA acts as a xenoestrogen, meaning that it interacts with estrogen receptors in your body, mimicking estrogen. Overexposure to xenoestrogens can create a hormone imbalance. Considering that 80% of breast cancers are estrogen receptor positive (meaning that the cancer cells contain estrogen receptors on them), having excess estrogen circulating through your system will facilitate the growth of these cancer cells. Avoiding exposure to xenoestrogens like BPA is one way to help stop the growth of these estrogen receptor positive breast cancer cells.

2. Parabens

Most people enjoy daily use of various cosmetic products, but what they don’t know is that many of these items harbor carcinogens called parabens. Parabens are chemicals commonly used as preservatives in products like deodorant, lotion, makeup and hair care products. If you aren’t diligent about avoiding parabens, chances are you are being exposed to this chemical regularly. Sadly, these toxins are hard to detoxify and bio-accumulate in fat cells. This is especially alarming when considering that breast tissue is fatty tissue. A 2014 review published in the Journal of Applied Toxicology found that parabens disturb normal functioning of your endocrine system (meaning that it causes hormonal imbalances). The study also found that parabens decrease the suppression of breast cancer cell growth, meaning that your body starts to lose its ability to stop cancer formation. Perhaps the scariest part is that parabens were found in 99% of breast tissue samples that were taken during the study. Your best bet is to limit exposure to parabens in the first place by purchasing cosmetic products that are labeled “paraben free.”

3. Alcohol

Ok ladies, I love wine just as much as you, but it’s time to address some of damage we might be doing to ourselves with our daily glass (or two) of wine. Alcohol has been shown to contribute to estrogen dominance, a condition that refers to an imbalance of estrogen and progesterone in the body. As mentioned above, 80% of cancers are estrogen receptor positive, so a solid way to fend off this type of cancer is to keep your estrogen and alcohol consumption in check. A 2015 study from The British Medical Journal examined 136,000 participants over a 30-year period and concluded that women who drink a glass of wine per day are 13% more likely to develop estrogen-related cancers. So before you indulge in your favorite way to consume grapes, also take into account that there’s more at risk than a hangover.

4. Pesticides

DDT is a pesticide that was actually banned in 1972 because it was shown to contribute to the formation of certain cancers. Unfortunately, DDT is still showing up in our food supply despite the banning. Find yourself fighting family members over the importance of eating organic? Share this with them: Research from 2007 published in Environmental Health Perspectives found that early life exposure to DDT can effectively predict breast cancer risk. The research showed that subjects with high serum levels of DDT at an early age were 5 times more likely to develop breast cancer. The major takeaway here is to buy organic, local food from farmers that you have developed a relationship with and trust. That way you’ll really be eating clean.
Obviously, there’s a lot more that goes into developing breast cancer than using cheap shampoo and having one too many drinks, but limiting your exposure to these four problematic substances is a step in the right direction toward breast cancer prevention and overall good health.
blog-divider-line
amber-lowry-2016Amber is a recent graduate of Montclair State University’s Communication and Media Arts program. She has contributed various articles to Whole Foods Magazine as well as Fox News Latino. Passionate about both health and social issues, Amber is currently the co-host of a podcast that aims to educate folks on how to apply ancestral health practices in the modern world. She takes a moderate stance in most areas of life and believes that health is an extremely personal journey that relies on open-mindedness and self-awareness. Her aspirations include earning a master’s degree within the realm of health communication and becoming a French Bulldog mom.

Sources
Konieczna, A., Rutkowska, A., & Rachon, D. (2015). Health risk of exposure to Bisphenol A (BPA). National Institute of Public Health – National Institute of Hygiene, 66(1) 5-11. Retrieved from: http://www.ncbi.nlm.nih.gov/pubmed/25813067
Darbre, P. D., & Harvery, P. W. (2014). Parabens can enable hallmarks and characteristics of cancer in human breast epithelial cells: a review of the literature with reference to new exposure and regulatory status. Journal of Applied Toxicology, 34(9) 925-938. Retrieved from http://www.ncbi.nlm.nih.gov/pubmed/25047802
Cao, Y., Willett, W., Rimm, E., Stampfer, M., Giovannucci, E. (2015). Light to moderate intake of alcohol, drinking patterns, and risk of cancer: results from two prospective US cohort studies. BMJ. doi:10.1136/bmj.h4238
Cohn, B. A., Wolff, M. S., Circillo, P. M., & Sholtz, R. I. (2007). DDT and breast cancer in young women: new data on the significance of age at exposure. Environmental Health Perspectives, 115(10) 1406-1414. Retrieved from http://www.ncbi.nlm.nih.gov/pubmed/17938728
October 27, 2016

3 Mouthwatering Mexican Food Recipes

3 MouthWatering Mexican Food Recipes

By Teresa Zavala, DDC

Did we say Mexican food? YES! We are talking about that colorful, authentic, homemade, grandma-style cooking. The kind that brings the whole family to the table – mouths full and faces smiling. If you are looking to bring the family together and create some new memories, here are 3 delicious dishes that are sure to get your taste buds dancing!
blog-divider-line

Chicken Enchiladas

Serves 4
INGREDIENTS
Chicken
2 garlic cloves
½ yellow onion
1 lb. free-range chicken
¼ cup cilantro
organic corn tortillas (available at Sprouts)
water (as needed)
salt (to taste)
Enchilada Sauce
1 to 2 tomatoes
½ yellow onion
2 garlic cloves
1 tsp. oregano
pinch cumin
1 Tbsp. ground chile ancho (available at Sprouts)
2 tsp. ground chile California (available at Sprouts)
1 cup water
salt (to taste)
Toppings
1 avocado
1 cup grass-fed, shredded mozzarella cheese
2 handfuls lettuce
INSTRUCTIONS
• Place chicken, onion, garlic and cilantro in a pot. Cover with water and add salt.
• Boil for 20 mins or until chicken is fully cooked.
• Drain chicken and let it cool.
• Shred chicken and put it aside
Sauce:
• In another pot, boil 1 cup of water, tomatoes, onion and garlic for ~15 mins. Tomatoes should be very soft.
• Blend ingredients fully.
• Place sauce in a pan, add oregano, cumin, chili and salt.
• Let sauce simmer for about 3 mins (add additional water if sauce is too thick).
Assemble enchiladas:
• Once sauce is ready, heat up your tortilla in a skillet and dip it in the sauce pan (tortilla should be fully coated).
• Place tortilla in a plate add shredded chicken and some sauce inside. Rolled it up. If desired, add more sauce on top.
• Top it off with chopped lettuce, slices of avocado and shredded mozzarella cheese.
• Boom! Your enchiladas are ready to eat.
Sides: Well accompanied by Mexican red rice and beans.
blog-divider-line

Caldo de Pollo (chicken soup)

Serves 4
INGREDIENTS
6 cups of water
1 onion, chopped
2 tomatoes, chopped
2 garlic cloves, minced
1 cup potatoes, chopped
1 cup carrots, chopped
1 cup celery, chopped
1 chile poblano or green bell pepper, chopped
1 small cabbage, cut into medium pieces
½ cup cilantro, chopped
½ tsp. cumin
2 tsp. oregano
1 lb. free-range chicken
salt (to taste)
INSTRUCTIONS
• Place water, tomatoes, onion, garlic, oregano and salt in a pot and let it simmer for about 15 mins.
• Add chicken, potatoes, carrots and cilantro and let it lightly boil for about 15mins.
• (until potatoes are semi soft)
• Add chile poblano and celery and let everything cook fully. about 10mins.
• Once everything is done, turn off heat and add in cabbage.
• Let cabbage sit for 2-3 mins and serve!
*Organic corn tortillas always go well with caldo de pollo. (Available at Sprouts)
blog-divider-line

Chile con Carne (beef in red sauce)

Serves 6
INGREDIENTS
Beef:
1 ½ lbs. grass-fed beef chuck roast
salt (to taste)
Black pepper (to taste)
¼ tsp. paprika
¼ tsp. garlic powder
Sauce:
1 cup of water
1 tomato
2 to 3 dried chile de arbol *these can be spicy (available at Sprouts)
1 Tbsp. chile California powder (available at Sprouts)
1 tsp. chipotle powder
Salt
2 cups potatoes (chopped into small bites)
INSTRUCTIONS
• Preheat oven at 365 degrees. Place beef chuck roast in an oven safe container and season with salt, black pepper, garlic powder and paprika.
• Cook beef for 30 mins and flip meat. Let it cook for another 15 to 25 mins.
• While beef is cooking, place 1 cup of water, tomatoes and chile de arbol in a pot and let boil for about 15 mins.
• Once boiling, place inside a blender or food processor until it has a “sauce” texture.
• After beef is cooked, take it out of the oven and let it cool.
• Shred beef and put aside.
• Place chopped potatoes in a big pan and add sauce, let it simmer for 7 mins.
• Add meat, California chili, chipotle and salt and let it simmer for another 10 mins. Enjoy!
*Goes well with rice and organic corn tortilla chips.

teresa-headshot-1Teresa was born in Mexico and migrated to the U.S., bringing with her traditional Mexican food recipes. Her love for delicious-tasting food and health led her to become a Dolce Diet Coach and pursue creating her own recipe book. Teresa and her husband Chris share a passion for the outdoors and are currently working together to live an eco-friendly nomadic lifestyle. Teresa believes in leading by example and is driven to share her holistic approach to life with the world.

blog-divider-line
dolce-diet-1-on-1-consult-800

October 26, 2016

Wrestling the Scale: A Call for Action in the Sport of Wrestling

Wrestling the Scale: A Call for Action in the Sport of Wrestling

By Ridge Kiley, CSCS, Former D1 Wrester

cuttingweight
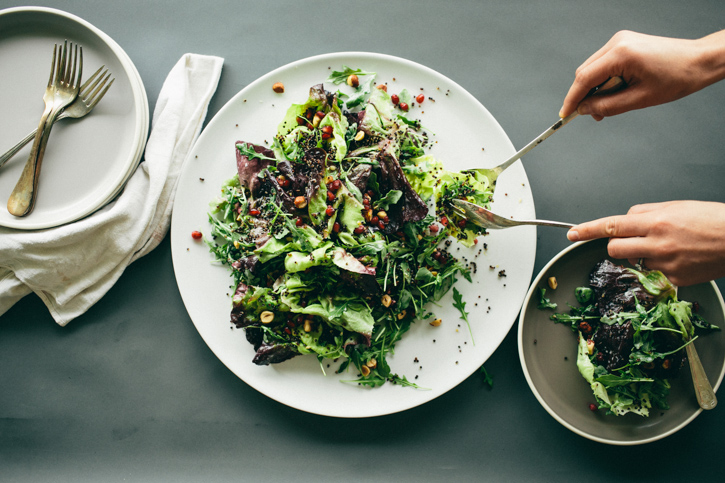
Wrestlers are the greatest athletes on the planet with the worst diets. To be successful, wrestlers need strength, speed, flexibility, endurance, agility and power, all of which are negatively affected by the caloric restriction and dehydration incurred during a typical weight cut.
I have personally seen weight cutting ruin wrestling careers. Teammates and friends of mine have quit, hated the sport, lost interest, or became injured all from the root cause of weight cutting (though not all injuries are caused by dehydration). I personally have been so dehydrated and malnourished that stepping in front of a car sounded like a good idea, so I could eat and drink without repercussions from coaches. I know I’m not the only one that has felt this way.
Weight cutting has been around in combat sports for many, many years. The common perceived advantages of cutting weight is that it allows you to be bigger, faster and stronger than your opponent. But at what point does a perceived advantage become a disadvantage? With the current certification and weigh-in protocols for high school and collegiate wrestling, athletes aren’t able to find success with short-term rapid weight loss.
Often, wrestlers are pressured by coaches, parents or teammates to obtain a lower weight class in pursuit of greater success. While the team may benefit overall, the athlete usually competes at suboptimal levels. Ideally, male athletes would compete at body fat ranges from 7%-12%, and most optimally between 7% and 9%. Ideal body fat levels for female combat sport athletes range from 16% to 20%. The most successful male combat athletes on the planet, (Olympic athletes), have been shown to compete between 6.9% and 7.9% body fat. Unfortunately, individuals practicing weight cutting often fall victim to one of two things:
1) They don’t achieve optimal body weight and body fat before the season starts
OR
2) Athletes are at or below an optimal body weight and body fat, and continue to lose weight through calorie and fluid restriction
Athletes choosing to use harsh weight cutting methods end up throwing away all the hard work (strength and endurance gains) they invested in the off-season. Unfortunately, small guys get the short(er) end of the stick. Weight classes are spread out, which puts certain guys in “limbo” – stuck between weight classes – too small for one, maybe too big for another.
Additionally, small guys end up having to lose a greater percentage of body weight compared to bigger guys. Ten pounds on a 125-pounder is NOT the same as 10 lbs. on a 197-pounder (8% of body weight compared to 5%). Although each person will react differently to the effects of dehydration, research consistently shows that as dehydration levels increase, performance dramatically decreases and risk for injury increases.

Dehydration & Physical Performance

The negative effects of dehydration start at just 2%, which include: decreased muscle strength, decreased endurance, decreased coordination, increased core temperature, increased heart rate, increased perceived exertion (RPE), increased glycogen (carbohydrate) usage, altered metabolic function, decreased mental acuity, altered central nervous system function, reduction in blood volume, decreased skin blood flow, decreased sweat rate, decreased heat dissipation, central nervous system dysfunction, and cardiovascular strain. Sounds like a lot right? Athletes losing up to 5% body weight loss are at an even greater risk for: nausea, cramps, vomiting, fainting, kidney failure, and even death (Jetton et al., 2013; Gann, Tinsley, & La Bounty, 2015; Sawka et al., 2007; Jeukendrup & Gleeson, 2010).

Dehydration & Psychological Performance

Not only does dehydration have negative physical side effects, it can also affect mental performance. As one with personal experience cutting large amounts of weight, I believe there are some (and I use this term loosely) positive psychological benefits from cutting weight. There is an element of prestige, discipline, focus, confidence, and mental toughness one gains from pushing their body to limits they never thought were possible. That being said, an athlete doesn’t have to go through a weight cut to become “mentally tough” – that’s what grueling practices are for.
Research has shown weight cutting negatively affects mood and contributes to feelings of fatigue, anger, anxiety, tension, and confusion. Dehydration is shown to cause a 23% decrease in motivation and a 70% increase in fatigue compared to being in a hydrated state. It has also shown to disrupt short-term memory, attention, arithmetic ability, and response time (Lieberman, 2007 & Kalman and Lepeley, 2010 & Grandjean and Grandjean, 2006). Cutting weight can also impact eating behaviors and in extreme cases lead to disordered eating (binge eating, purging, etc.) (Gann et al. 2015; Jones et al., 2008). Are these things you want to be dealing with going into competition?
In the left picture below is me just 4 months after competing at the D1 NCAA Tournament at 133 lbs. In the picture, I weighed about 170 lbs with roughly 7% body fat.
ridge-620
My optimal competition weight should have been 157 lbs (however James Green, returning AA at the time and now current World Bronze medalist was there). Looking back, 165 lbs would have been tough, but I know I would have competed at my absolute best for the whole season. Instead, I was forced to wrestle off at 149 lbs against teammate and friend/stud, Jake Sueflohn. Struggling to make 151 lbs for the wrestle off, I lost both matches, and was faced with a tough decision – go down to 141 lbs or potentially sit on the bench for my 5th and final season. I ended up losing all of the muscle I had worked so hard to put on (picture on the right).
I had the best training of my life that summer – I truly believe I could have (and was going to) obtain All-American status my final year. Long-story short, large amounts of weight cutting ultimately ended in increasingly poor performances throughout the season. Behind the scenes, I felt terrible, had consistently bad practices, and performed poorly. I was always competing against the scale, not against my opponents.

Poor Practices Lead to Poor Habits

The effects of weight cutting go far beyond competition alone. Given most athletes begin “the weight cut” each Monday, this means that athletes are practicing in a nutritionally-compromised/dehydrated state most, if not all, week long. As stated above, this has negative physical effects and strips athletes of the ability to practice at optimal levels. Poor performances during practices result in poor habits. Poor habits are revealed in competition. Subpar performances in practice and competition affect confidence. A wrestler that isn’t confident in their abilities won’t perform well. With those variables, wrestlers might be competing at 40-75% of their optimal state.
The bottom line: current weight cutting methods are outdated. Although unhealthy weight loss isn’t always the intention, it’s almost always the outcome. It’s important to note that just because it works, doesn’t mean it’s the safest, healthiest, or best option. Athletes looking to have an edge over their opponents need to fix two key components of wrestling: nutrition and hydration.

The Future of Wrestling

The “suck it up” and “tough it out” philosophies of weight cutting are no longer necessary. Wrestling is evolving. Don’t believe me? Take a look at these studs that found success in folkstyle from NOT cutting weight. Most of these athletes were/are competing at lean/optimal body weights.
Kyle Dake → 141 → 149 → 157 → 165: 4x NCAA Champion at 4 weight classes
Jordan Burroughs → 149 to 157: National Champion → 157 to 165: National Champion
Kyle Snyder → 197 to heavyweight → National Champion
Nashon Garrett → 125 to 133 → National Champion
Alex Dieringer → 157 to 165 → 2nd & 3rd consecutive titles
Steven Rodrigues → 141 to 165 → All-American
In conclusion, extreme weight cutting is not the path to success in folkstyle wrestling. One or 2-hour weigh-ins do not allow the body to adequately rehydrate and refuel before competition. Instead, optimal performance is obtained through a balanced diet, maintaining a healthier day-to-day weight, and safe/modest fluid manipulation. Moreover, success is achieved through sustainable lifestyle management 365 days a year. The greats of wrestling fall in love with the process and look forward to getting better every single day. Embracing the grind is a must. Having fun is a must. As many reading this know, a season full of large weight cuts is not fun. It creates burnout and hatred towards a sport you once loved.

The Solution

Here at The Dolce Diet, it is our passion to see athletes perform at their peak potential. It is also our passion to see athletes live the healthiest life possible. As one of the most decorated nutrition companies in weight-class sports, we have the tools to help you end the yo-yo dieting cycle, find sustainability and achieve athletic success. In addition to working with MMA’s most elite, we also work closely with high school, collegiate and Olympic level wrestlers. Some of our current clients include teams or individuals from Campbell University, Purdue University, Penn State and Oklahoma State.
We see a huge need for reform in the wrestling community. As a result, we have recently expanded our services to include one-on-one consultations and individual nutrition plans for wrestlers of all ages. If you are looking to take your nutrition to the next level, go to TheDolceDiet.com and schedule a consultation with one of our sports dietitians today.
If you have any questions, feel free to send me a direct message or email me at ridge@thedolcediet.com.
dolce-diet-1-on-1-consult-800

References
Gann, J.J.; Tinsley, G.M.; La Bounty, P.M. (October 2015). Weight Cycling: Prevalence, Strategies, and Effects on Combat Athletes. Strength & Conditioning Journal. 37(5): 105-111. doi: 10.1519/SSC.0000000000000168
Grandjean, A.C.; Grandjean, N.R. (2006, November). Dehydration and Cognitive Performance. Journal of the American College of Nutrition. Paper presented at ILSI North America Conference on Hydration and Health Promotion.
Jetton, A.M., Lawrence, M.M., Meucci, M., Haines, T.L., Collier, S.R., Morris, D.M., Utter, A.C. (May 2013). Dehydration and Acute Weight Gain in Mixed Martial Arts Fighters Before Competition. 27(5): 1322-1326. doi: 10.1519/JSC.0b013e31828a1e91
Jeukendrup, A., Gleeson, M. (2010). Dehydration and its effects on Performance. Water Requirements and Fluid Balance. Sport Nutrition – An Introduction to Energy Production and Performance (2nd Edition). (195-220). Champaign, Illinois:Human Kinetics.
Jones, L.C.; Cleary, M.A.; Lopez, R.M.; Zuri, R.E.; Lopez, R. (March 2008). Active Dehydration Impairs Upper and Lower Body Anaerobic Muscular Power. Journal of Strength & Conditioning Research. 22(2): 455-463. doi: 10.1519/JSC.0b013e3181635ba5
Kalman, D.S.; Lepeley, A. (April 2010). A Review of Hydration. Strength and Conditioning Journal. 32(2): 56-63. doi: 10.1519/SSC.0b013e3181c21172
Sawka, M.N.; Burke, L.M.; Eichner, R.E.; Maughan, R.J.; Montain, S.J.; Stachenfeld, N.S. (February 2007). Exercise and Fluid Replacement. Medicine & Science in Sports & Exercise. 39(2): 377-390. doi: 10.1249/mss.0b013e31802ca597
October 24, 2016

4 Ways to Fight Off the Flu with Nutrition

4 Ways to Fight Off the Flu with Nutrition

By Lindsay Howard

It’s officially flu season! Everyone is coughing, sniffling, and calling off work! If you don’t want to be down for the count, here are 4 Ways to Fight Off the Flu with Nutrition!

1. Drink enough water!

Staying well hydrated will keep the mucus membranes in your nose and mouth moist, which will allow them to do what they are supposed to do: fight off bacteria and viruses! If you find that you forget to drink and often go long periods of time without drinking water, try setting a reminder on your phone. Also, if you don’t have digestive issues, aim to drink 8 to 16 ounces of water with each meal. Small adjustments like increasing your fluid intake can have a great impact on your health this flu season!

2. Add an extra serving of fruits and vegetables each day!

Fruits and vegetables are rich in antioxidants and Vitamin C. Those most potent in vitamin C include: berries, oranges, kiwis, broccoli, kale, bell peppers, potatoes, and tomatoes. Try a smoothie with a blend of kale and fruit to keep it interesting!

3. Increase your Vitamin A intake!

Vitamin A helps your body create a type of white blood cell that is important for protection against infection! Vitamin A-rich foods include: kale, spinach, carrots, and sweet potatoes.

4. Get your Vitamin D!

Vitamin D has been proven to enhance the immune system, helping to prevent the flu and other common infections that peak during the winter months. Sunshine this time of year can be hard to come by; especially if you live in North Eastern Pennsylvania like myself. Ensure you’re meeting getting your daily vitamin D from foods like fatty fish, eggs, cheese, fortified almond milk. Given the high rates of vitamin D deficiency, we also recommend scheduling a blood panel with your doctor! Based on your results, your doctor may recommend you take a vitamin D supplement.
Some additional tips for fighting the flu: get adequate amounts of vitamin ZZZ (sleep) and wash your hands frequently!
blog-divider-line
dolce-diet-1-on-1-consult-800

October 20, 2016

3 Sweet Treat Recipes For Any Occasion

3 Sweet Treat Recipes For Any Occasion

By Mary Spiegelberg, Dolce Diet Intern & Nicole Kiley, MSc, RD

Tis’ the season of holiday parties and goody bags! The potluck table has enough store-bought dessert. Be the life of the party and bring these freshly-made holiday treats! Shhhh… no one has to know they also have nutritional value! It’s a Dolce trick-or-treat!
blog-divider-line

Chocolate Covered Fruit Kabobs

The Goods:
2 large bananas, sliced thin
2 cups strawberries, sliced thick
¾ cup blueberries
¾ cup raspberries
½ cup organic dark chocolate chips
½ tsp. coconut oil
¼ cup unsweetened shredded coconut
1/3 cup roasted salted almonds, finely chopped
10 to 12 wooden skewers
The Method:
• First, slice and separate fruit into piles. Line a dish or baking sheet with parchment paper.
• Place chocolate chips in small pot and heat on low. Stir until completely melted. Once melted, stir in coconut oil and set aside.
• Thread fruit onto skewers leaving a couple inches open at the bottom. Place skewers on baking sheet.
• Using a fork, drizzle skewers with desired amount of melted chocolate. It will harden nicely at room temperature due to the coconut oil. Sprinkle desired amount of coconut and almonds. Store in the fridge fro up to 3 days.
blog-divider-line

Sweet Cherry Popcorn

The Goods:
6 heaping cups organic popped corn
¼ cup agave nectar or honey
¼ cup room temperature creamy natural peanut butter or almond butter
1/3 cup pretzels
¼ cup organic dark chocolate chips
2 tablespoons finely chopped dried cherries
The Method:
• In small pot, heat chocolate chips on low. Stir until melted completely. Dip pretzels and place on parchment paper. Let cool in freezer for 10 minutes. Take pretzels out of freezer and finely chop.
• Line a baking sheet with wax (or parchment) paper.
• Grab a medium bowl and fill with ice water.
• Combine your honey and peanut butter in a small sauce pan and cook over medium heat. Stir your mixture gently and consistently. When your mix begins to bubble, stir for an additional 15 seconds. Pour the mix evenly over the popcorn and mix softly with a wooden spoon. Mix until popcorn is well and evenly coated. Grab your dark chocolate covered pretzels and chopped cherries and stir them into the mix.
• Now for the ice water, dip both of your hands into the water and press small handfuls of your popcorn mixture into 2 inch balls. Place the balls on your prepped baking sheet. If you aren’t satisfied and your balls seem a bit fragile, feel free to dunk your hands back into the ice water and squeeze the balls to better keep them together.
• Let the balls cool completely. Bag your balls in Halloween themed plastic wrap and suddenly you have the perfect goody bag to send home with your party guests!
blog-divider-line

Dark Chocolate Bark

The Goods:
1/2 cup toasted hazelnuts, chopped
16 ounces dark chocolate
1 teaspoon vanilla extract
1 teaspoon ground cinnamon
1 cup brown rice cereal
The Method:
• Line a large baking sheet with parchment paper set aside. Toast hazelnuts in a dry pan until warmed and fragrant. Let the nuts cool, then chop and set chopped pieces aside.
• In a double boiler or small pot, slowly melt chocolate, stirring gently with a wooden spoon until smooth. Stir in vanilla and cinnamon; add brown rice cereal and mix gently. Pour mixture onto lined baking sheet and smooth out evenly into a rectangular shape (it doesn’t have to be perfect).
• Sprinkle with chopped hazelnuts and set aside for 1 to 2 hours (or 30 to 45 minutes in the fridge) until chocolate hardens. Break into pieces and serve.
blog-divider-line
Mary Spiegelberg currently is pursuing a degree in Dietetics and Food Administration with a minor in Food Science at Cal State Long Beach. Her primary field of concentration is Sports Nutrition. She is a member of UCLA’s Performance Nutrition Team, who work to fuel, sustain and improve performance of collegiate athletes. She is a Newport Beach native and proud owner of Hooked Boxing, LLC.
blog-divider-line
dolce-diet-1-on-1-consult-800

October 19, 2016

3 Easy Ways to Get More Veggies Into Your Diet

3 Easy Ways to Get More Veggies into Your Diet

By Amber Lowry

We’re all well aware of the “eat more veggies” narrative, but how do we actually apply this to our often time-restricted, chaotic lives? Throw kids into the mix, and it seems that getting both you and your family to chow down on the veggie color spectrum is more of a hassle than its worth. But good news: there are super simple ways to eat more body-loving vegetables without all the junk and over-processing associated with most “sneaky” veggie food products on the market. Here are just three ways to get more of these amazing plants into your diet without sacrificing too much time or sanity!

1. Cauliflower rice

Cauliflower has made a trendy transformation into a rice-like food that’s finding its way into fresh and frozen produce sections all over the country. A known staple in many alternative health circles, cauliflower ‘rice’ is a fun way to get all the nutrients of cauliflower without the trademark veggie look and feel. Known for its ridiculously awesome antioxidant and anti-inflammatory properties, cauliflower can be easily blended into a rice-like consistency by sticking chunks of it into a blender or food processor and graded against a cheese grader. Once broken down into the desired texture, this ‘rice’ can be steamed with a tiny amount of water on the stovetop for less than 5 minutes, or lightly sautéed until it’s softened with a touch of oil like coconut or avocado. Season it up to your liking (Himalayan sea salt and pepper are always a good choice) and boom! You can also add it to your favorite protein source (like grass-fed meat), along with a healthy fat option like avocado coupled with fresh favorites like herbs and salsa, and you’ve got yourself a “bowl” of deliciousness that would give certain fast-food chains a run for their money!

2. Veggie noodles

Spiralized veggie “pasta” is a great way to get all kinds of veggies into one meal. Zucchini, squash, carrots, beets and sweet potato are just a handful of hearty vegetables perfect for the heavy sauces that accompany pasta dishes. Thanks to a recent surge in popularity, spiralizers are cheaper (some as low as $10-15) and more easy to come by both online and in stores. Not only does spiralizing veggies help you maintain a more nutrient-dense diet, but it also serves as a great pasta substitute if you don’t desire the bulk of a carbohydrate-rich meal. We’ve all been there: We eat a big plate of pasta and immediately enter into a food coma, waking up several hours later feeling as though we just got hit by a truck. Spiralizing vegetables tricks you into thinking you are eating pasta while also energizing you and providing you with valuable nutrients that you need for optimal health. They can be eaten raw or by lightly sautéing in oil or boiling for a couple of minutes till softened. Experiment with different sauces, meats, seafood and veggies to discover what works for you!

3. Veggie sticks with fun dips

How much fun can carrot and celery sticks be? Lots, actually! Taking the traditional snack-time veggie stick and creating fun, satisfying dips can change how you view raw veggies. Try delicious yet nutritious options like nut butter and crowd pleasers like guacamole. Have you ever dipped celery sticks into some raw almond butter? The crunch of the celery sticks combined with the creaminess of the almond butter creates a satisfying snack that provides you with valuable nutrients like fiber and protein. Using guacamole is a great way to stay satiated until it’s time to eat your next meal. The fat from the avocado and the fiber from the veggie sticks work synergistically to fill you up while simultaneously offering key nutrients such as potassium.
No one knows you and your family better than you do. The best way to make sure veggies end up on your plate is to understand and practice healthy preparation methods that speak to your own individual palate. It’s all about using your creative energy to enjoy the earth-grown nutrients that undeniably should be a bigger part of all dietary lifestyles.

blog-divider-line
amber-lowry-2016Amber is a recent graduate of Montclair State University’s Communication and Media Arts program. She has contributed various articles to Whole Foods Magazine as well as Fox News Latino. Passionate about both health and social issues, Amber is currently the co-host of a podcast that aims to educate folks on how to apply ancestral health practices in the modern world. She takes a moderate stance in most areas of life and believes that health is an extremely personal journey that relies on open-mindedness and self-awareness. Her aspirations include earning a master’s degree within the realm of health communication and becoming a French Bulldog mom.
blog-divider-line
dolce-diet-1-on-1-consult-800

October 17, 2016

5 Salmon Recipes You Need!

5 Omega-3-Rich Salmon Recipes

By Nicole Kiley, MSc, RD

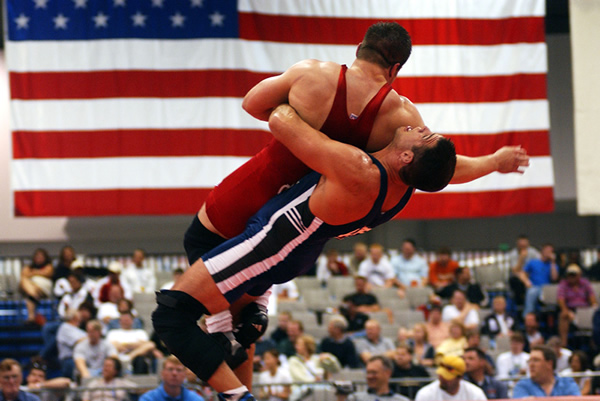
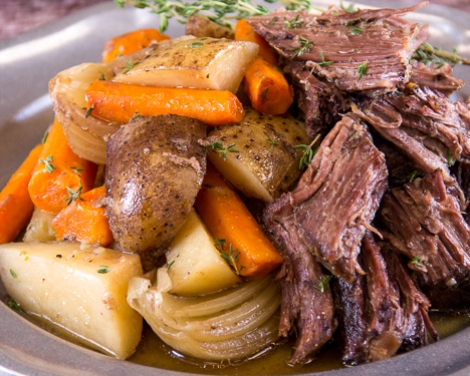
Omega-3 fatty acids aid in combating inflammation. A diet rich in omega-3s has been shown to lower one’s risk of chronic diseases such as cardiovascular disease, cancer and arthritis. Omega-3s also appear to be highly concentrated in the brain, showing a role in cognition, mood and behavior. Omega-3s are an essential fatty acid, meaning they are not made by the body and must be obtained through one’s diet.
It’s important to note that there is a difference between omega 3 sources from animals (EPA + DHA) and plants (ALA). While both should be included as part of a balanced diet, most therapeutic benefits have been linked to animal sources. Omega-3-rich animal sources include grass-fed meats and fatty fish such as halibut, tuna and salmon. Here are 5 heart-protecting salmon recipes you and your family will love!
blog-divider-line

Herb Butter Salmon w/ Blistered Tomatoes + Green Beans

Ingredients:
2 cups cherry tomatoes
4 cups string beans
2 Tbsp. extra virgin olive oil or grass-fed butter
Pinch sea salt
Pinch cracked black pepper
1 lb. wild-caught salmon
Herb Butter:
¼ cup grass-fed butter
¼ cup packed fresh parsley
¼ cup packed fresh basil
2 garlic cloves, minced
Pinch sea salt
Instructions:
• Preheat oven to broil high.
• In a bowl toss tomatoes and string beans with oil or butter. Add salt and pepper.
• Place on a baking sheet and broil for 5 minutes.
• While broiling, combine butter ingredients in a blender and blend until combined.
• Brush onto salmon and add salmon to baking sheet.
• Broil for 7 to 9 minutes (longer for thicker salmon), until veggies are blistered and salmon is cooked through. Add additional salt and pepper as desired.
blog-divider-line

Simple Honey-Glazed Salmon

Ingredients:
½ lb. wild-caught salmon
Dash sea salt
1 Tbsp. honey
Avocado oil
Instructions:
• Coat small pan with avocado oil and heat on medium-low.
• Rub salmon with avocado oil and sprinkle with sea salt.
• Cook 3 to 5 minutes on each side, depending upon thickness. Salmon should be cooked evenly through the center.
• Plate and drizzle with honey. Serve with a side of grains and greens!
blog-divider-line

Horseradish Encrusted Salmon

Ingredients:
Homemade Horseradish
2 cups horseradish root, peeled and chopped
¼ cup water
Dash sea salt
3 Tbsp. vinegar
Crust
1 ½ cup horseradish
2 Tbsp. melted grass-fed butter
1 Tbsp. Dijon mustard
½ tsp. freshly ground pepper
½ tsp. sea salt
½ tsp. garlic granules
¼ lemon juiced (optional)
Other
1 lb. wild-caught salmon
Instructions:
• Combine horseradish root and water in food processor. Pulse until horseradish is ground.
• Remove and add sea salt and vinegar, mix well.
• When ready to make your crust, line baking sheet with foil or parchment and lay salmon out.
• In a bowl combine crust ingredients and mix to combine. Brush over salmon fillets. Broil on high for 7 to 9 minutes.
• *The longer you wait to add vinegar, the stronger the horseradish will be.
blog-divider-line

Sticky Asian Glazed Salmon

Ingredients:
Marinade
¼ cup coconut aminos
¼ Tbsp. raw honey
2 Tbsp. balsamic vinegar
2 garlic cloves, crushed
3 Tbsp. fresh grated ginger
Dash red pepper flakes (optional)
Other
1 lb. wild-caught salmon
½ Tbsp. sesame seeds
Scallions (garnish)
Instructions:
• In a bowl mix together marinade ingredients and pour over salmon.
• Let marinade for at least 20 minutes in the fridge (the longer the better).
• Place oven on broil. Transfer salmon to a baking sheet and broil for 8 to 20 minutes.
• Garnish with scallions and serve.
blog-divider-line

Salmon, Green Beans + Avocado Bake

Ingredients:
1 lb. fresh green beans, edges trimmed
2 Tbsp. avocado oil
1 Tbsp. extra virgin olive oil
Dash Pink Himalayan sea salt
Dash freshly ground black pepper
4 (6 oz.) boneless, skinless salmon filets
2 avocados, peeled & chopped
1 Tbsp. white wine vinegar
2 Tbsp. chopped fresh dill
Instructions:
• Heat oven to 400 degrees F. Mix the beans with 2 Tbsp. avocado oil, dash of salt and pepper in a casserole dish. Tuck the fish in the beans and bake until the beans are crisp-tender and the fish is just flaky throughout, about 8 minutes.
• Meanwhile, combine the avocados, vinegar, dill, olive oil and dash of salt in a bowl.
• Plate the fish and beans, and top with avocado mixture.
dolce-diet-1-on-1-consult-800

October 14, 2016

4 Sexy Salad Recipes

4 Sexy Salad Recipes

By Nicole Kiley, MSc, RD

No more plain-jane unappealing salads that leave you feeling unsatisfied. Salads shouldn’t be “diety,” they should be nutritionally-balanced, flavorful and satiating! Add one of these sexy salads to your next family dinner, you won’t be disappointed!
blog-divider-line

Winter Greens + Crispy Quinoa Salad

Serves 5
The Salad:
1 Tbsp. coconut oil
3/4 cup cooked and completely cooled quinoa
1 head butter lettuce
2 cups arugula
3/4 cup toasted hazelnuts, roughly chopped
1 cup pomegranate seeds
The Dressing:
1/4 cup lemon juice
1 clove garlic, finely minced or grated
2 Tbsp. red wine vinegar
1 Tbsp. honey
1 tsp. sea salt
1 tsp. dried Italian herbs
pinch of pepper
1/3 cup low-fat, plain Greek yogurt
3 Tbsp. extra virgin olive oil
Instructions:
• Heat the coconut oil over high heat in a frying pan. Once it’s hot, add the cooked quinoa and sauté for about 2-3 minutes until dry and crisp. You want the steam to release and hear the crackling, add a bit more oil if needed. Set aside to cool completely.
• Prepare the dressing. Whisk the lemon juice, garlic, vinegar, honey, salt, herbs, pepper and yogurt in a bowl. Whisk in the oil, taste for seasoning and alter as you wish. This can be made up to a week in advance.
• Toss both greens in the dressing to coat, top with the crispy quinoa, hazelnuts and pomegranate seeds and serve immediately.
blog-divider-line

Green Bean + Black Quinoa Salad

Serves 5
The Salad:
1/4 cup extra virgin olive oil
3 Tbsp. white balsamic
2 tsp. honey
1 clove garlic
Handful of basil leaves
Pinch of salt + pepper
1/2 cup quinoa (black or red is pretty, but any color works)
1 lb. green beans, ends trimmed
2 scallions/green onions
1/2 cup hazelnuts, toasted and skins removed, roughly chopped
Instructions:
• In a blender or food processor, whirl all of the dressing ingredients together. Taste for salt and pepper and set aside in the fridge.
• Bring 1 cup water to a boil and add the quinoa, turn the heat down to a simmer, cover and cook for about 20 minutes or until all the liquid is absorbed. Transfer to a large mixing bowl to cool.
• Steam the green beans until just barely softened. Drain well. Add the drained green beans to the cooled quinoa. Thinly slice the scallions and add them, and half of the chopped hazelnuts to the bowl and toss with desired amount of the dressing. Finish the salad with a few grinds of fresh black pepper and the rest of the hazelnuts. Serve at room temperature or chill in the fridge. The leftovers hold up great!
blog-divider-line

Power Green Salad

Serves 4
The Salad:
3 cups ribbed and chopped kale
Handful of chopped parsley
1 cup cooked black lentils
1 green apple, diced
1/2 cucumber, diced
1/2 cup toasted pepitas (pumpkin seeds)
1 cup shaved parmesan
The Dressing:
1 clove garlic
1 Tbsp. honey
1 Tbsp. Dijon mustard
Juice of one lemon
1/3 cup pumpkin seed oil or extra virgin olive oil
Salt and pepper
Instructions:
• In a large salad bowl, combine the kale, parsley, lentils, apples, cucumber, pepitas and parmesan.
• For the dressing, blitz everything in a food processor or blender, with salt and pepper to taste, until the garlic is smooth.
• Pour the dressing on the salad and toss well to coat. The salad will keep in the fridge for a full day and slowly loose it’s crunch from there.
blog-divider-line

Spicy Butternut + Kale Chopped Salad

Serves 5
The Salad:
1.5 lb. butternut squash, peeled, seeded and cubed
2 Tbsp. coconut oil or extra virgin olive oil
2 heaping tsp. organic taco seasoning
1 large bunch of lacinato/Tuscan kale
3 green onions, sliced thin
1/3 cup toasted pepitas (pumpkin seeds)
1/2 cup crumbled feta cheese, plus more for garnish
1 avocado, diced
handful of organic corn tortilla chips
The Dressing:
Juice of one lime
3 Tbsp. extra virgin olive oil
1 Tbsp. agave nectar
1/2 tsp. sea salt and pepper, to taste
Instructions:
• Preheat the oven to 400 degrees F. Put the squash on the tray and drizzle with the olive oil, taco seasoning and a few pinches of salt only if your seasoning does not contain salt. Toss to coat and spread in an even layer. Roast in the upper third of the oven for 25 minutes or until just softened and the edges begin to brown. Remove and cool completely.
• Remove the stems from the kale and chop it well. Put it in a large mixing bowl with the green onions. Whisk your dressing ingredients together, pour it on the kale and massage it into the kale with your hands. This will soften up the leaves. You may prep the dressing in advance; store in fridge.
• When ready to assemble your salad, toss the pepitas, feta, avocado and cooled squash with the greens to combine. Crumble the tortilla chips on top along with a little extra feta cheese.
Sources: SproutedKitchen.com

October 13, 2016

5 Energy Bite Recipes You'll Love

5 Energy Bite Recipes You’ll Love

By Nicole Kiley, MSc, RD

Mango Energy Bites
Mango Energy Bites

Looking for a new tasty snack option? Try making energy bites! Energy bites (balls) are a great snack option because they are nutritionally balanced, versatile, and easy to prepare. True to their name, energy bites can be energy (calorie) dense. For this reason, they serve as a nourishing snack option during a long hike, after physical activity, or for those always-moving children of yours!
Here are 5 of our favorite energy bite recipes! Feel free to make them your own. Looking for additional protein? Add a couple tablespoons of protein powder. Dig the crunch? Swap the creamy nut butter for crunchy. Need some added fiber? Roll your finished energy bites in a light layer of chia or hemp seeds. Get creative! The options are limitless!
blog-divider-line

Apple Chai Energy Bites

Serves 20
Ingredients
1 ½ cups rolled oats
½ cup almond butter
¼ cup honey
1 ½ cup dried apple, chopped
¼ teaspoon cinnamon
1/8 teaspoon ground cloves
1/8 teaspoon ground cardamom
1/8 teaspoon ground ginger
Instructions
• In a large bowl, mix together all ingredients with a wooden spoon. If the mixture is too dry, add additional honey. If too wet, add additional oats.
• Using a tablespoon, scoop dough and roll into ball using palm of hands.
• Store in an air tight container or gallon-size bag in the refrigerator or freezer. May store in the refrigerator for 1 week, or in the freezer for up to 1 month.
blog-divider-line

Cranberry Almond Energy Bites

Serves 16
Ingredients
1 cup rolled oats
½ cup almonds, chopped
½ cup unsweetened shredded coconut
1 Tablespoon ground flaxseed
½ cup almond butter
¼ cup honey
1 Tablespoon chia seeds
½ cup dried cranberries, roughly chopped
Instructions
• Preheat oven to 350 degrees F. Bake oatmeal, almonds and coconut for 8 to 10 minutes, stirring after 5 minutes. Allow mixture to cool.
• In a small saucepan, heat the nut butter on low. Stir continuously with wooden spoon until runny. Remove from heat and add baked mix along with flaxseed, honey, chia seeds and cranberries to bowl.
• Form balls using palm of hands and place on baking sheet with wax paper. Refrigerate for 20 minutes.
• Store in an air tight container or gallon-size bag in the refrigerator or freezer. May store in the refrigerator for 1 week, or in the freezer for up to 1 month.
blog-divider-line
Dolce-Diet-living-lean-cookbook-Available-now-cc

Mango Energy Bites

Serves 20
Ingredients
1 ½ cup raw walnuts or cashews (or mixed)
1 cup firmly packed dried unsweetened mango
10 pitted dates
2 Tbsp. hemp seeds
1/3 cup unsweetened finely shredded coconut
Pinch of sea salt
Instructions
• Preheat oven to 350 degrees F and arrange nuts on a baking sheet. Toast for 8 to 12 minutes, or until light golden brown and fragrant. Set aside.
• While nuts are baking, add dried mango to a mixing bowl and cover with warm water. Let soak for 5 to 7 minutes. Drain mango and lay on a paper towel, patting off excess moisture. Set aside.
• Add nuts to a food processor and mix into a fine meal. Remove from bowl and set aside.
• Add pitted dates and soaked, dried mango to the food processor and mix until rough paste/sticky dough forms.
• Add nut meal back in, along with hemp seeds, shredded coconut, and sea salt. Mix until it forms a moldable dough. Add more coconut or hemp seed if it feels to sticky or wet. Add more dates if it’s too dry.
• Scoop out rounded tablespoon amounts and roll into a ball with the palm of your hands. Then roll in shredded coconut or hemp seeds, or a mixture of both.
• Enjoy immediately. Store in an air tight container or gallon-size bag in the refrigerator or freezer. May store in the refrigerator for 1 week, or in the freezer for up to 1 month.
blog-divider-line

Peanut Butter Chocolate Oat Energy Bites

Serves 24
Ingredients
1 cup rolled oats
½ cup dark chocolate chips
½ cup ground flaxseed
½ cup natural crunchy peanut butter
1/3 cup honey
1 tsp. vanilla extract
Instructions
• Combine oats, chocolate chips, flaxseed, peanut butter, honey, and vanilla extract together in a bowl. Form into balls using hands and arrange on baking sheet with wax paper. Freeze energy bites until set (1 hour).
• Store in an air tight container or gallon-size bag in the refrigerator or freezer. May store in the refrigerator for 1 week, or in the freezer for up to 1 month.
blog-divider-line

Pumpkin Pie Energy Bites

Serves 20
Ingredients
1 cup rolled oats
¼ cup flaxseed meal
1 ½ teaspoon cinnamon
¼ cup natural peanut butter
¼ cup organic canned pumpkin
2 Tablespoons maple syrup
1 Tablespoon honey
1 teaspoon vanilla extract
Instructions
• Add all ingredients to bowl and mix with wooden spoon. Once mixture is thoroughly combined, refrigerate for 15 minutes.
• Roll mixture into 1-inch balls using the palm of your hands.
• Store in an air tight container or gallon-size bag in the refrigerator or freezer. May store in the refrigerator for 1 week, or in the freezer for up to 1 month.

October 12, 2016

3 Slow Cooker Dump Recipes You Can Freeze

3 Slow Cooker Dump Recipes You Can Freeze

Slow Cooker Hawaiian Chicken

Ingredients
– 1 lb boneless, skinless chicken breasts, cut into bite-sized pieces
– 1 fresh pineapple, stalk, skin, and core removed and fruit cut into bite-sized pieces
– 2 tablespoons honey
– 2 tablespoons Bragg’s Liquid Aminos
Materials
– 1 gallon-sized plastic freezer bag
– 1 All-purpose sticky label (Get here)
– Label your freezer bag with name of meal and how to cook.
To Freeze
– To your freezer bag, add pineapple, honey, Bragg’s Liquid Aminos and chicken breasts. (Add the chicken breasts to the bag last, so they’re the first ingredient poured into your slow cooker.)
– Remove as much air from the freezer bag as possible, seal, and lay flat in your freezer.
– When ready to eat, thaw overnight in refrigerator.
To Cook
– The morning of cooking, pour contents of freezer bag into your slow cooker and cook on “low” setting for 3-6 hours, or until chicken is cooked through and tender.
Serve with brown rice and broccoli, and enjoy!
blog-divider-line

Slow Cooker Stuffed Peppers

Makes 4 servings
Ingredients
– 1 tablespoon olive oil
– 1 lb+ ground turkey (or beef)
– 1 onion, peeled and diced
– 1 garlic clove, minced
– 4 small bell peppers, tops cut off and cleaned
– 24 oz jar of your favorite organic pasta sauce (reserve 2 Tablespoons)
– 1/2 cup water

Materials

– 1 gallon-sized plastic freezer bag
– 1 All-purpose sticky label (Get here)
– Label your freezer bag with name of meal and how to cook.
To freeze
– In large bowl, mix ground meat, onion, garlic, and 2 tablespoons of pasta sauce.
– Separate mixture into four equal parts and firmly stuff into peppers.
– Place peppers in freezer bag. Add remaining pasta sauce to separate freezer bag and keep near the peppers.
– Remove as much air as possible and freeze for up to three months. When ready to eat, thaw overnight in refrigerator.
To Cook
– Coat bottom of slow cooker with 1 tablespoon of olive oil.
– Place peppers in slow cooker and cover with remaining pasta sauce.
– Cook on low for 6-8 hours or until meat is cooked through and peppers are soft.
Serve with pasta and a salad.
blog-divider-line

Slow Cooker Beef Roast and Carrot Recipe

Ingredients
– 2-pound grass-fed boneless beef chuck shoulder roast
– 1-2 pounds carrots, peeled and chopped into bite-sized pieces
– 3 tablespoons extra virgin olive oil
– 2 tablespoons red wine vinegar
– 3 tablespoons of your favorite beef seasoning (Get Spicely Organic’s Chili Chipotle Seasoning here)
Materials
– 1 gallon-sized plastic freezer bag
– 1 All-purpose sticky label (Get here)
– Label your freezer bag with name of meal and how to cook.
To Freeze
Combine all ingredients in a gallon-sized plastic freezer bag. Remove as much air as possible and freeze for up to three months. When ready to eat, thaw overnight in refrigerator.
To Cook
– Combine all ingredients in your slow cooker.
– Add lid, and cook on “low” setting for 8 hours until beef shreds easily with a fork.
blog-divider-line
dolce-diet-1-on-1-consult-800

October 11, 2016